Categories
- SWATCHES
- SHEETS
- PRE-NIPPED Crystal Glass
- MIXED-MEDIA Bags
- TILES : Ceramic/Porcelain
- INSERTS and EMBELISHMENTS
- KITS
- TOOLS, GLUE, MESH
- GROUT
- BASES
- PATTERNS and E-BOOKS
Specials
-

DARK PURPLE Smarties
R25.00 (-20%) R20.00
MOSAIC INFO:
- What is Mosaic?
- Mosaic Design
- Common Mosaic Mistakes
- Things to Consider
- Mosaic Colour Basics
- Mosaic Materials
- Mosaic Surfaces & Adhesives
- Transferring Mosaic Patterns
- Cutting Tools
- Cutting Techniques
- The Indirect Mosaic Method
- Pique Assiette Method
- Choosing Grout Colour
- How to Grout your Mosaic
- Side Finishing Options
Search
Pique Assiette Mosaic Method:
When most people hear the term "pique assiette mosaic" they automatically think of a mosaic created from broken china. Although the name "Pique Assiette" is a french term meaning "stolen from plate", technically though this is not entirely accurate as this also encompasses pieces of broken china, pottery, glass, buttons, figurines, and jewellery which are cemented onto a base to create a new surface. Almost any form can be used as a base and any combination of pieces can be applied - the design is restricted only by the individual's imagination and there is no right or wrong way when creating Pique Assiette mosaics.
BROKEN CHINA MOSAIC (PIQUE ASSIETTE):
If you want to create heirloom pieces, here are a few key things to keep in mind:
1. DO NOT SMASH YOUR PLATES WITH HAMMERS!! Leave the hammer to the nails. Although some mosaic artists do advise using a hammer, this leads to too many "smashed" and completely random peices - its definitely preferable to have more controlled cuts.
2.QUALITY MOSAICS REQUIRE TIME. Don't expect to finish a quality piece in a day or even a weekend. A few people have said to me "But this takes so LONG..." - yes, but to get to the finished article that you want it's always worth taking your time and doing it properly the 1st time.
THE BASICS STEPS:
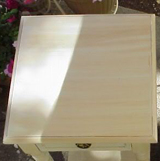 1. Prep Your Mosaic Base ~ this is where you need to prime, seal, and paint the base you intend to mosaic. Don't apply a top coat in the area where you will put the mosaic. Some bases need only a little sanding to give the thinset/mortar* something to grab onto.*Thinset is an adhesive mortar made of cement, fine sand and a water retaining agent such as an alkyl derivative of cellulose. It is usually used to attach tile or stone to surfaces such as cement or concrete.
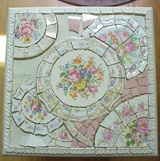 2. Creating/Selecting Mosaic Tiles, Mosaic Focals, Laying Out Design ~ this is where you determine which method of you will use gather all of your nipped china tiles and focals. You can always nip tiles as you go. This is also the time to see which tiles are the thickest. Do try to avoid extremes in the widths.
3. Adhering Tiles To the Mosaic Base ~ For direct or direct press methods , this is whether you are using mortar or glue, be sure to always begin with the thickest focal or tiles first. These will be your anchor and sets the height for the rest of the tiles and focals. Use glue to set the anchors and thinset/mortar for the focals and tiles that are thinner.
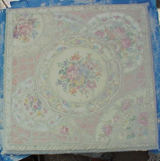
For the indirect methods, this is where you will pour the wet concrete into the mold, or press the prepared section onto the mortared base.
4. Prep for Grouting ~ after the thinset/mortar has set for at least 24 hours, tape off the base to protect the paint finish from the wet grout. Painters or masking tape is ideal.
5. Grouting The Mosaic Base ~ Mix and apply the grout, let dry for 15-20 minutes then clean the film off the tiles and focals. Remove any masking tape.
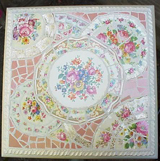
Add any grout to gaps or spaces you may have missed. It is also a good time to file or dremel any
6. Sealing the Mosaic Design ~ After the grout has cured (at least 72 hours) it is time to thoroughly seal the grout to protect it from stains and moisture. Grout sealers are available at most good hardware stores. sharp edges. Sharp edges must be dulled before you seal.
Cart
New products
No new products at this time
