Categories
- SWATCHES
- SHEETS
- PRE-NIPPED Crystal Glass
- MIXED-MEDIA Bags
- TILES : Ceramic/Porcelain
- INSERTS and EMBELISHMENTS
- KITS
- TOOLS, GLUE, MESH
- GROUT
- BASES
- PATTERNS and E-BOOKS
Specials
-

V : Letter Tile - Medium Ceramic Insert
R10.00 (-30%) R7.00
MOSAIC INFO:
- What is Mosaic?
- Mosaic Design
- Common Mosaic Mistakes
- Things to Consider
- Mosaic Colour Basics
- Mosaic Materials
- Mosaic Surfaces & Adhesives
- Transferring Mosaic Patterns
- Cutting Tools
- Cutting Techniques
- The Indirect Mosaic Method
- Pique Assiette Method
- Choosing Grout Colour
- How to Grout your Mosaic
- Side Finishing Options
Search
How to use the Indirect mosaic method:
For large scale works the indirect method is invaluable as it allows you to work on a mosaic away from the final site. This is particularly handy for the larger projects (e.g. floors or murals) or for mosaics that are difficult to access due to other objects or obstacles in the way.
It is also a fantastic method to use if the mosaic needs to be broken into sections.The indirect method has the additional benefit of being able to create a flat surface whilst still using pieces of tesserae of varying thickness. As the resulting mosaic is smooth, regardless of the tile size, this process is ideal when used for flooring.
Fixing the Design to the Adhesive Film or Backing
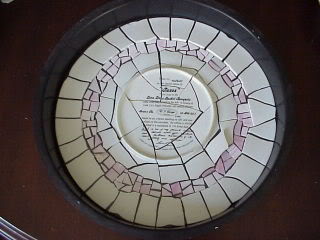
 Once you have all the tesserae cut, fitted and are satisfied with your layout, you will need to transfer your design onto the adhesive backing, front side down.
• All tesserae need to be clean and free of dirt, grease, and dust. Allow all pieces to dry thoroughly.
• Print your pattern reversed if this is required - for example, if you have a number or letter, this will need to be printed or transferred in reverse so that the letter is the right way around when you flip this over.
• Seperate the adhesive film from its backing and lay onto your pattern sticky side up. Transfer the pieces to the adhesive, front side down.
• For the paper backing method: After the design is set, your next step is to fix the design onto the paper. The cut tesserae are adhered face down using a water soluble glue or gum (wallpaper paste is a good alternative).
Preparing the Mold or Mortar Bed
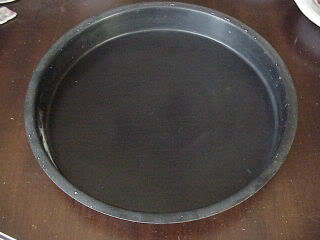
 Spray the mold bottom and sides with a release agent. There are several commercially available, check with your supplier. Vaseline®, Spray & Cook or silicone spray can be used. Apply liberally with a sponge brush and then use a hair dryer to smooth. You don’t want any ridges. Then tip the mold and gently slide the adhesive sheet with your design into position in the mold. Check your tesserae one last time. Also make sure the edge of the adhesive film is lying flat in the mold bottom and not curving up the sides.
Since paper-backed projects are pressed into a prepared bed of mortar, you need to prepare the surface and then apply the mortar according to the manufacturers instructions.
Mixing and Pouring the Cement
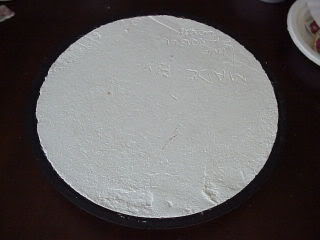
 Mix your cement according to manufacturer's instructions. Save a small amount (1/2 cup or so) of the final dry mix to use for filling in any gaps or pinholes you find after you un-mold the project. Be careful that as you mix, you avoid introducing air bubbles. Check the manufacturers instructions for consistency - less water is better as the thinner the concrete, the weaker your project will be. It's best if you can pour the concrete into the form in the place you intend to leave it to cure. Make sure the mold sits level. Start by pouring a thin layer around the edges to help hold the adhesive film down. Cover the bottom with a thin layer and then gently pat the top or tap the mold to release any bubbles and work the cement down between the tesserae. Continue filling the mold until you reach the top or your desired thickness.
You want to ‘screed’ or level the surface by taking a piece of wood or similar item that will span the width of the mold and draw it across the top to level and remove any excess cement. Wipe the edge/lip clean. Again, tap your mold edge and sides gently for a few minutes to release any bubbles. Some people also tap the surface the mold is sitting on. Be careful, this is more apt to dislodge the tesserae from the adhesive backing. Allow the mold to sit undisturbed for the required amount of set time, based on manufacturers instructions.
In a paper backing project, gently press the mosaic into the bed, paper side up. Allow the cement to set enough to hold the design in place so you can remove the paper but not so tight that you can’t make any needed adjustments.
Un-molding the Project
You need to now release the project from the mold
• Invert the mold onto several wooden dowels that span width of the mold in a place where your project can sit undisturbed for several weeks.
• Peel off the adhesive film. Check the surface for concrete films, seepage, gaps, pin holes, etc. Wipe or pick away excess cement now, while it is still soft. Mix up a bit of your saved, colored, dry ingredients and rub into any holes or gaps. Let it sit for 10 - 15 minutes and then wipe away the excess.
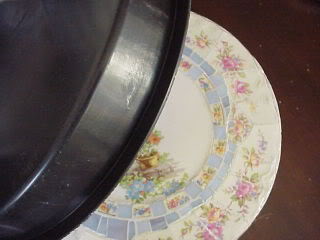
• Do not move your un-molded stone for at least a week and it is better to let it sit undisturbed for 30 days in order to achieve full strength. It is important to keep it elevated to allow air to circulate around all surfaces.
• If you used the paper backing method, you will now use a cloth or sponge to dampen the paper with. You want to loosen and peel it away from the tesserae without dislodging any pieces.
Grouting an Embedded Design
If you used the paper fixing method and then set your design into a motor or cement bed, you will need to fill in the gaps, or grout, between your tesserae after removing the paper baking. Generally, it is desirable to make the grout level with the overall height of the mosaic surface.
Sealing and Protection
Some materials and applications benefit from an application of sealant after the project has cured or the grout is dried and cured. You also want to protect your finished project from the elements.
• After 30 days, you will want to seal the top, sides and bottom of a poured project, no matter where its final placement will be. There are many concrete sealers available for cement. Apply as directed by the manufacturer to the grout lines, sides, and bottom. Avoid getting it on the tesserae and wipe away any excess.
• Sealing pebbles brings out their true 'wet' color. Other porous materials also benefit from sealing. Sealers are available in a matt or shiny finish. Read the bottle to see if it fits your application.
• Projects placed outside need to be protected from the elements. If your area receives snow or is subject to freeze thaw cycles, you may want to store it indoors to keep it from cracking. If you are creating a walkway, set the stones in a on a sand bed (about 2.5cm) to provide drainage and support.
Cart
New products
No new products at this time

